Getting started
Add your first router
Name it, pick a server and a plan. Your addresses are ready at once.
1 min read · Updated
Before you start
- For a paid plan, add balance first: bKash, Nagad, Rocket or card or USDT. The first period is paid when you save the router.
- The Free plan needs no balance: Winbox access for one router per account.
Steps
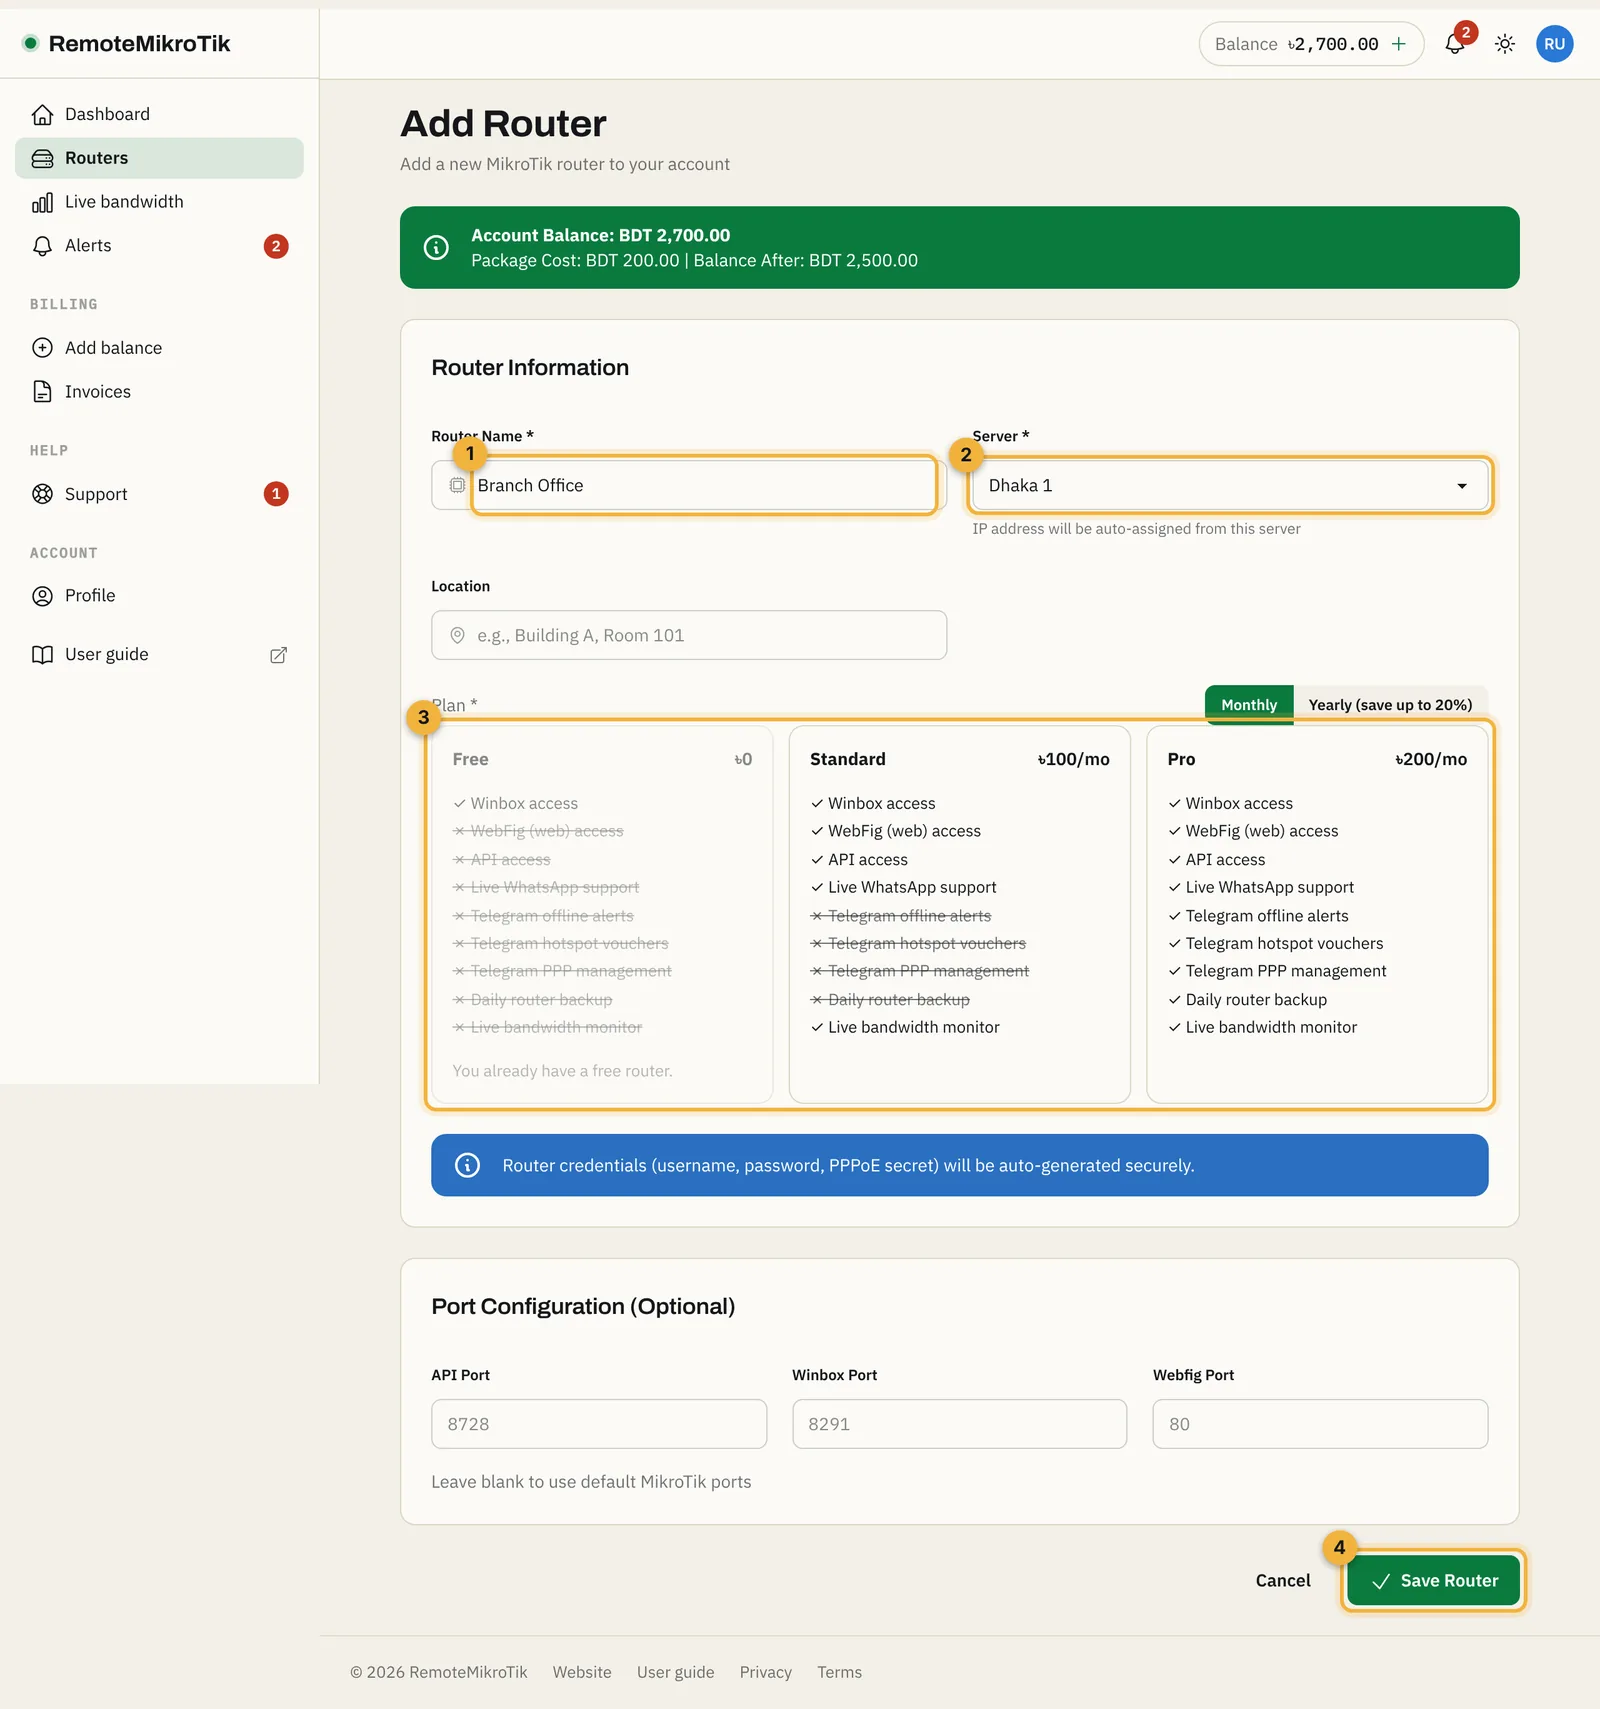
- In the panel, open Routers → Add router (or Add router on the dashboard). Enter a Router name you will recognise, such as the site or customer name.
- Choose a Server. Pick the one closest to the router's location.
- Choose a Plan, and Monthly or Yearly (yearly saves 20%). Each card lists what the plan includes.
- Press Save Router. The first period is taken from your balance, and the router's page opens.
Your router now has its own addresses, shown in the Connect card on its page. They don't work yet: the router still has to connect, which is the next step.
If something goes wrong
- "Insufficient balance": add balance, or choose the Free plan.
- "You can have only 1 router on the Free plan": the Free plan is one per account. Choose Standard or Pro for more routers.
- The Free card is greyed out: you already have a Free router.
Next: Run the setup script.
Questions
Can I change the plan later?
Yes, at any time from the router page. Upgrades apply at once; you pay only for the days left. See Change plan.
What are the optional port fields?
If you changed the Winbox, WebFig or API port on your router itself, enter the new numbers here. Most people leave them empty.
How many routers can I add?
As many as you like on paid plans. The Free plan allows one router per account.
Still stuck? Open a support ticket and tell us which step didn't work.